Thanks for downloading and using the Dynamic Store Locator app on Shopify. We appreciate you trusting us to help you build a store locator map that is effective and easy to use. Now that you’ve added locations to your map manually, by import, by integrating your Faire retailers, and/or by integrating Shopify B2B companies), you’re ready to add the map to your Shopify website.
In this guide, we’ll walk you through two options for adding the Dynamic Store Locator map to your Shopify website. By the end of this guide, your store locator map will be live on your site and available for customer interaction.
Before you begin: please ensure that you’ve taken the steps to generate a Google Maps API Key and added it in the Dynamic Store Locator app dashboard. If you haven’t yet done this, please see our guide on How to Setup A Google Maps API Key.
OPTION 1: Add the App Block
This is our recommended installation method. However, your store must be using Shopify 2.0 to utilize this method.
How do you know if you’re using Shopify 2.0?
The easiest way to check is to open your theme customizer by following the below Steps 1 and 2, navigate to any page besides the homepage (e.g., contact, store locator, or product page), and look for a blue “Add section” button at the bottom of any section in the left sidebar. If it exists, your theme is likely 2.0. If you don’t see any “Add section” buttons, then you’re not using Shopify 2.0 and you’ll have to use OPTION 2 to add the map to your website.
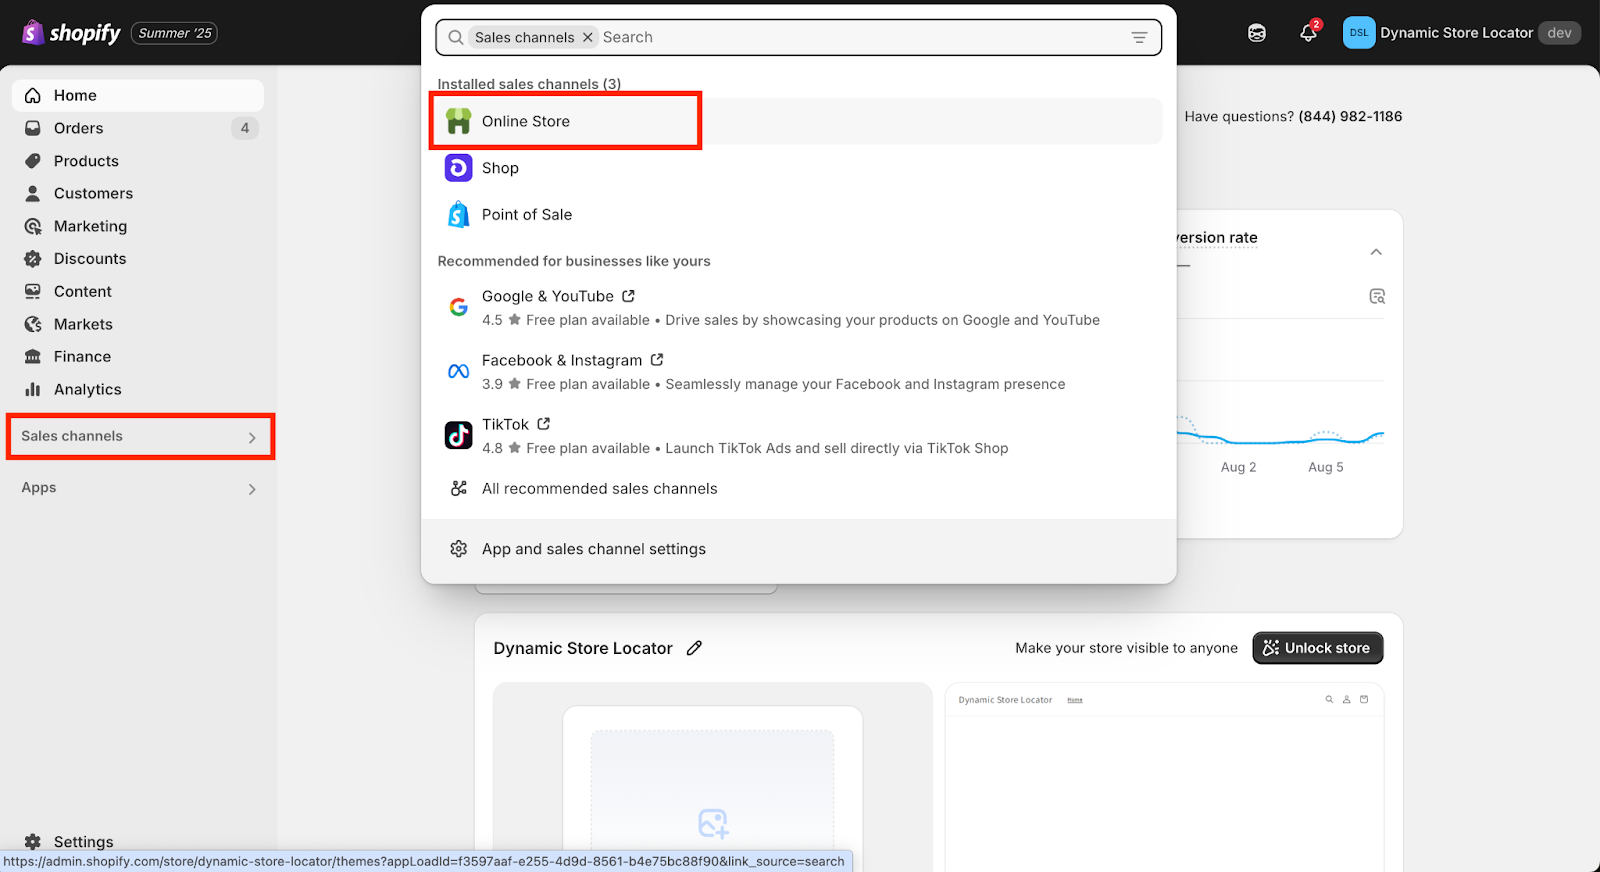
Step 1: Open the Shopify CMS
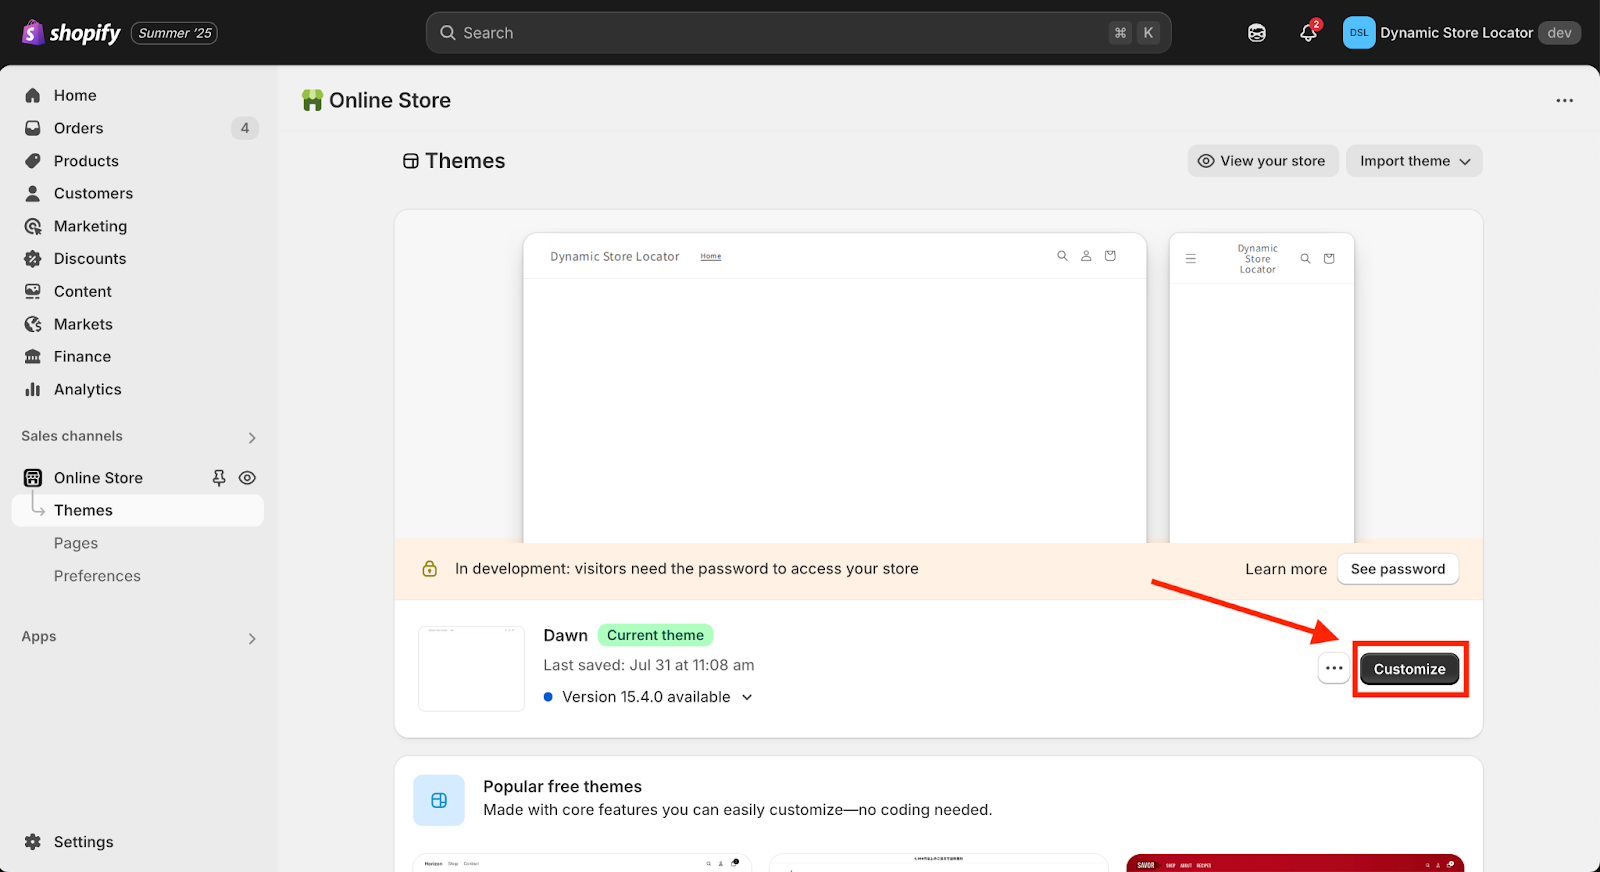
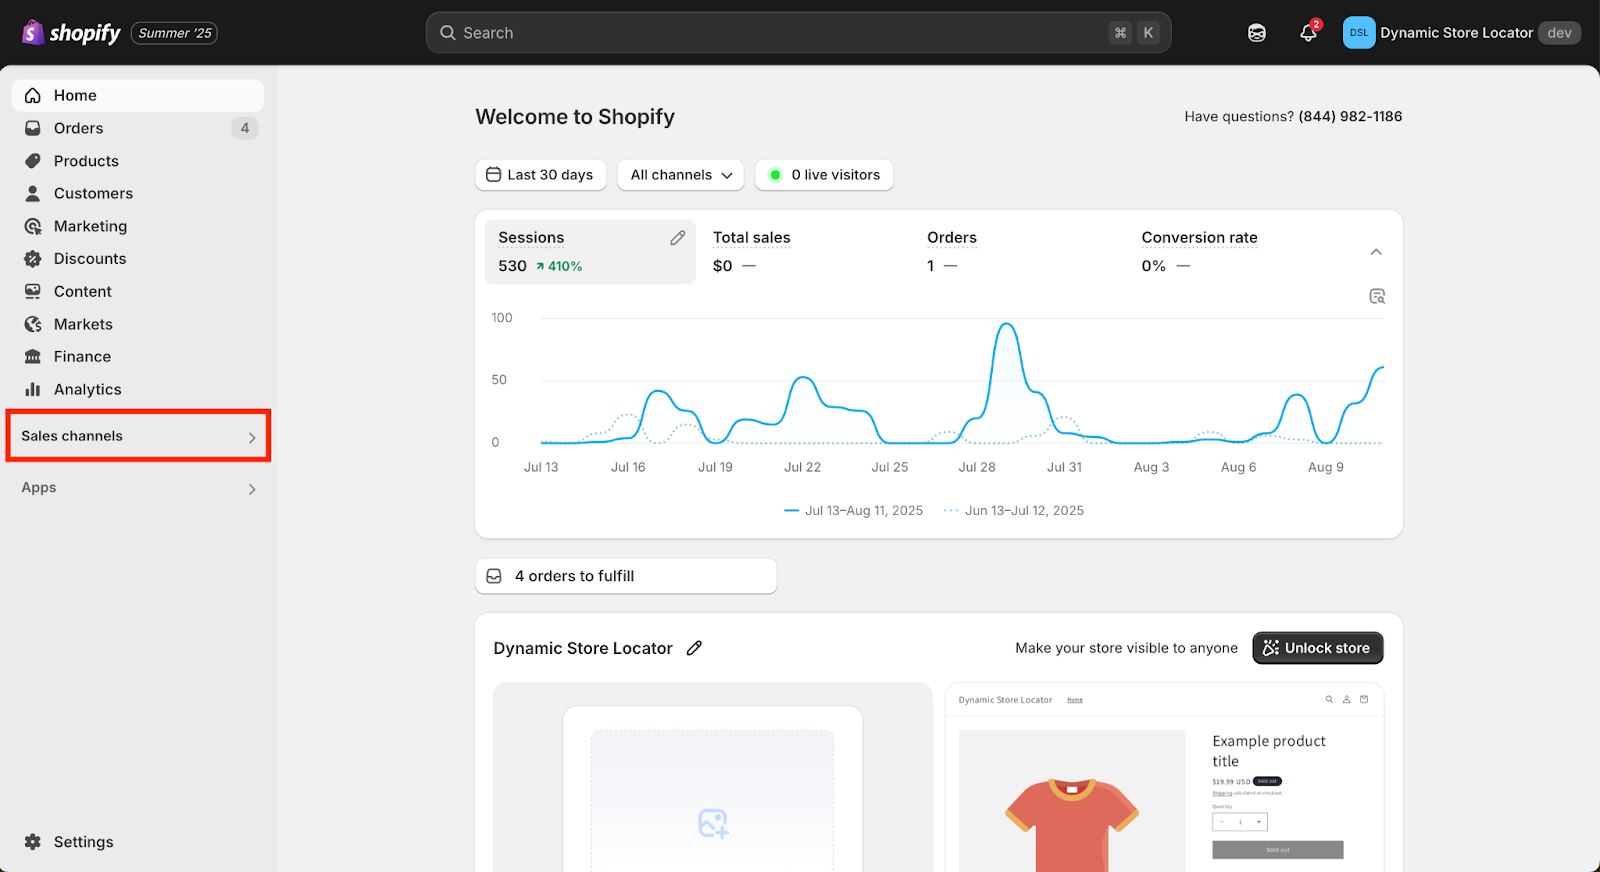
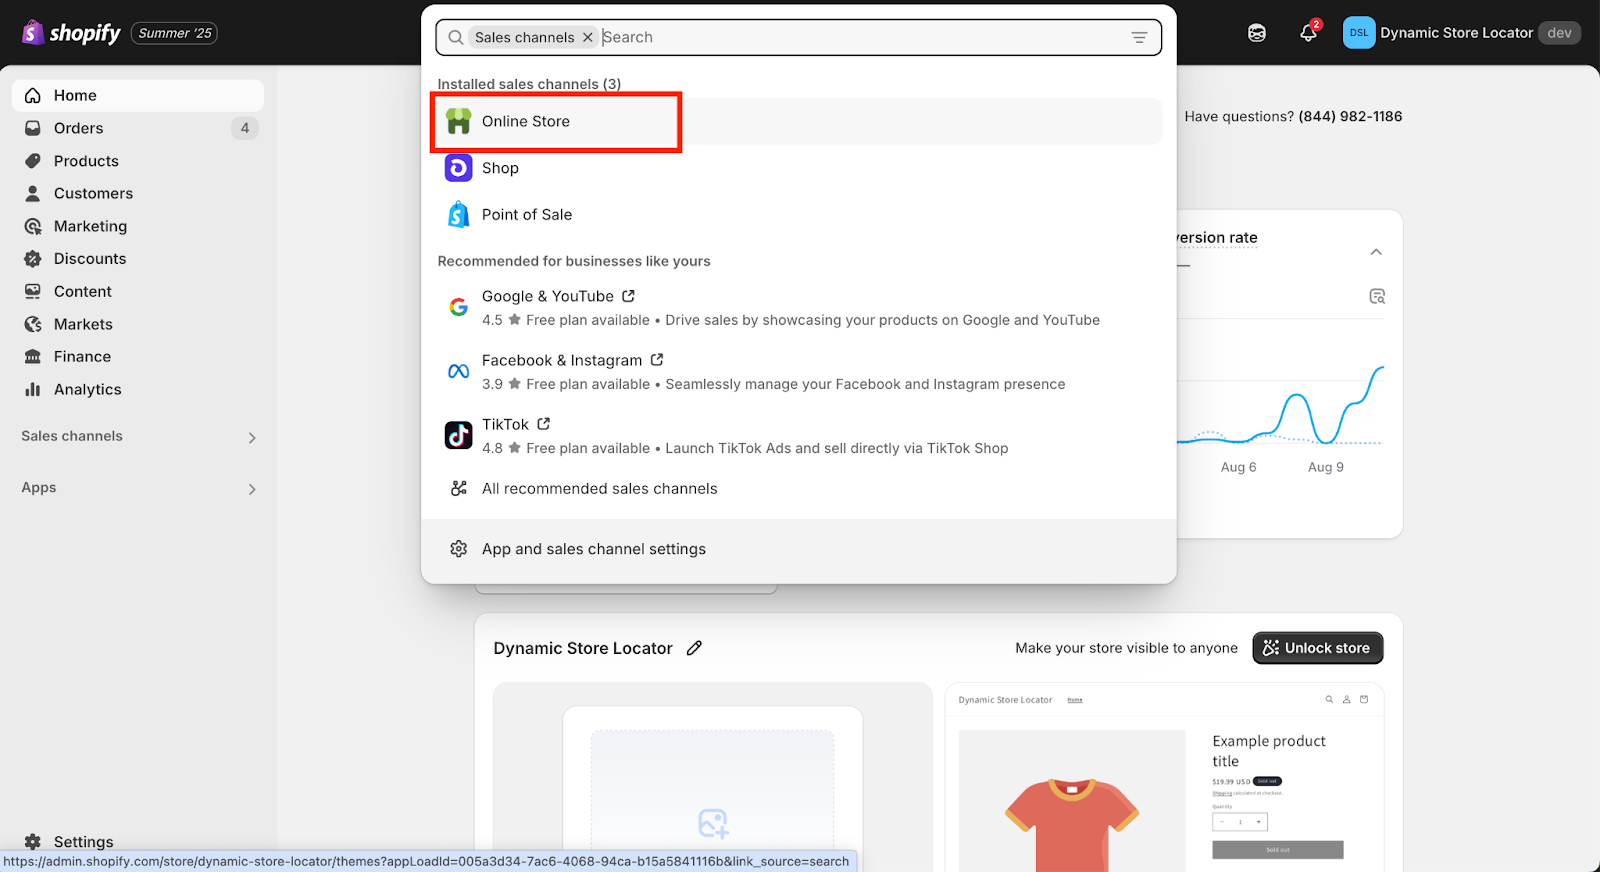
In your Shopify Admin, click “Sales Channels” then “Online Store” on the left side, and then click “Customize” next to the theme where you want to install the map.
Step 2: Find the Page Where You Want to Install the Store Locator
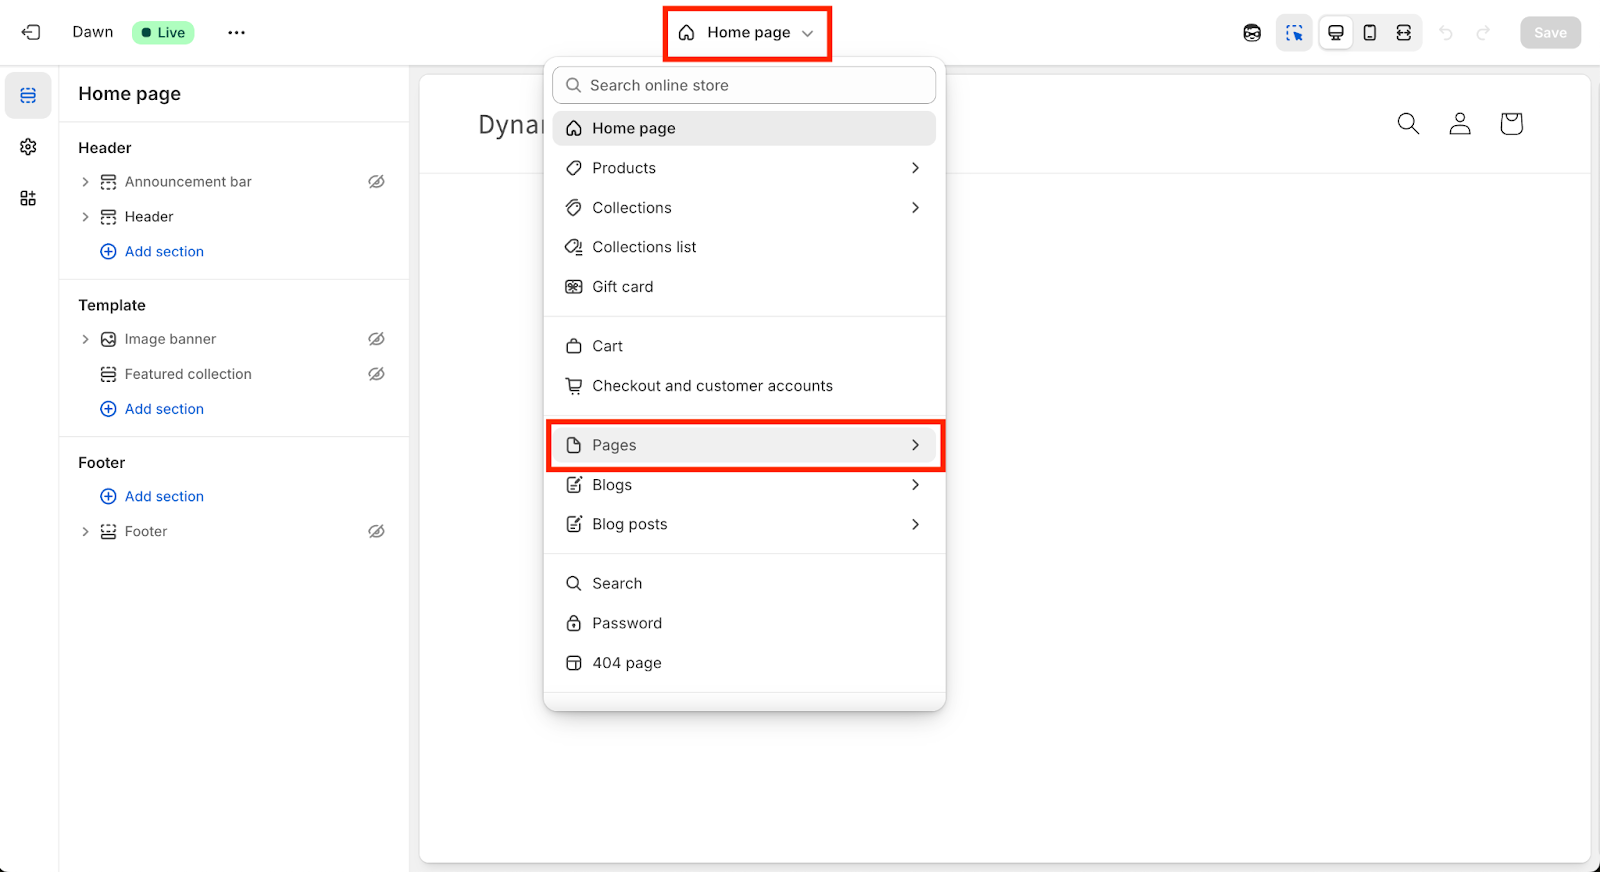
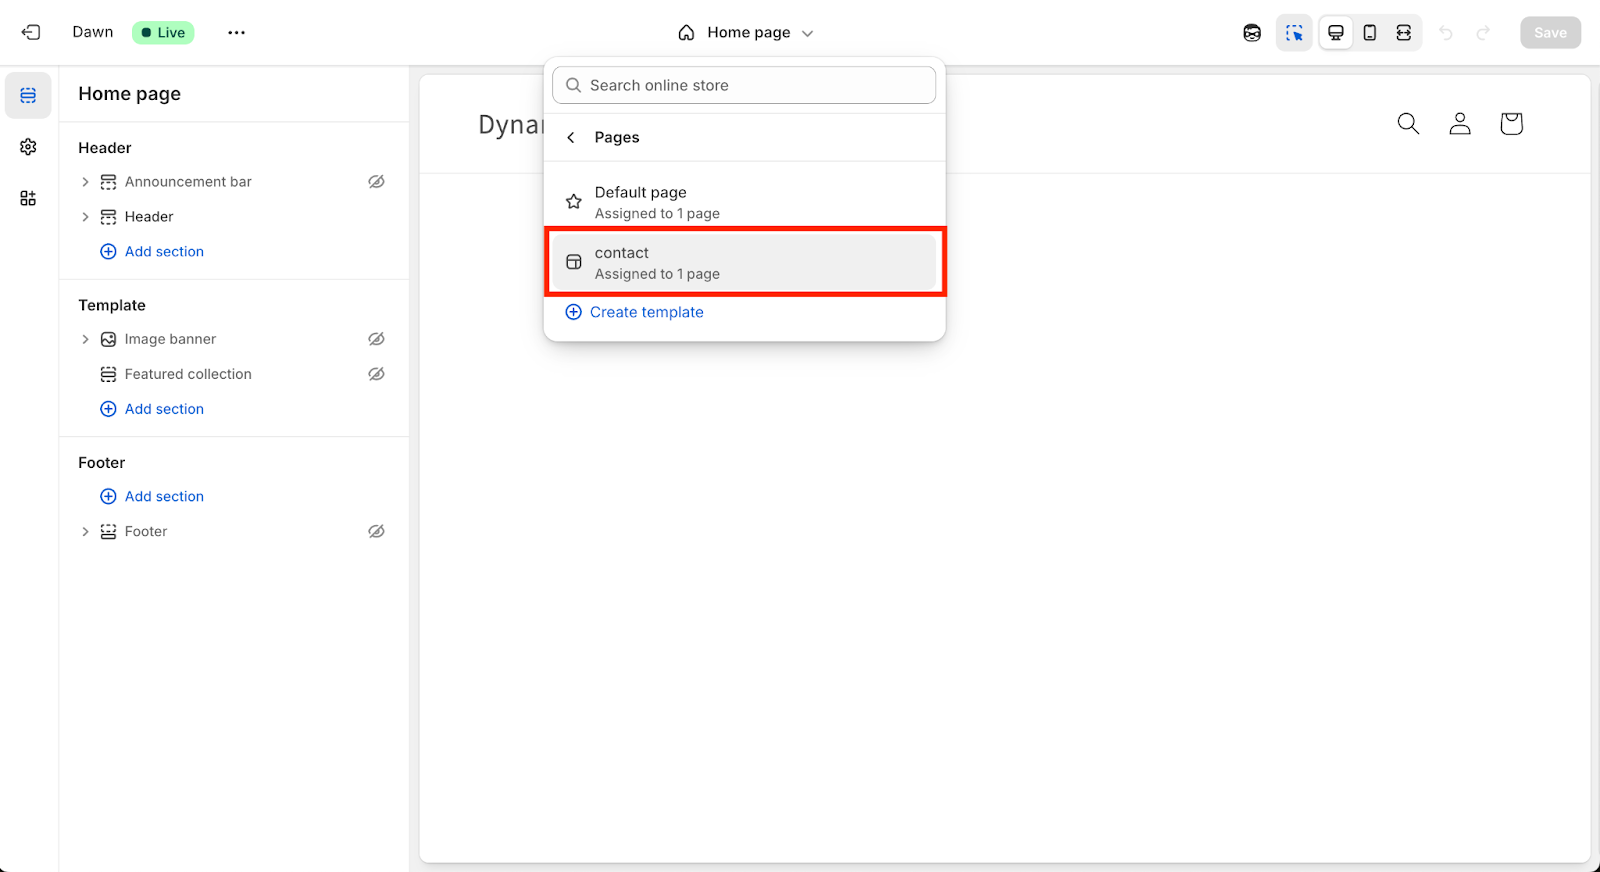
In the top bar, click the drop down and go to ‘Pages’ and find the page where you want to install the locator. (In this tutorial, we’re going to be adding our map to the Contact page.)
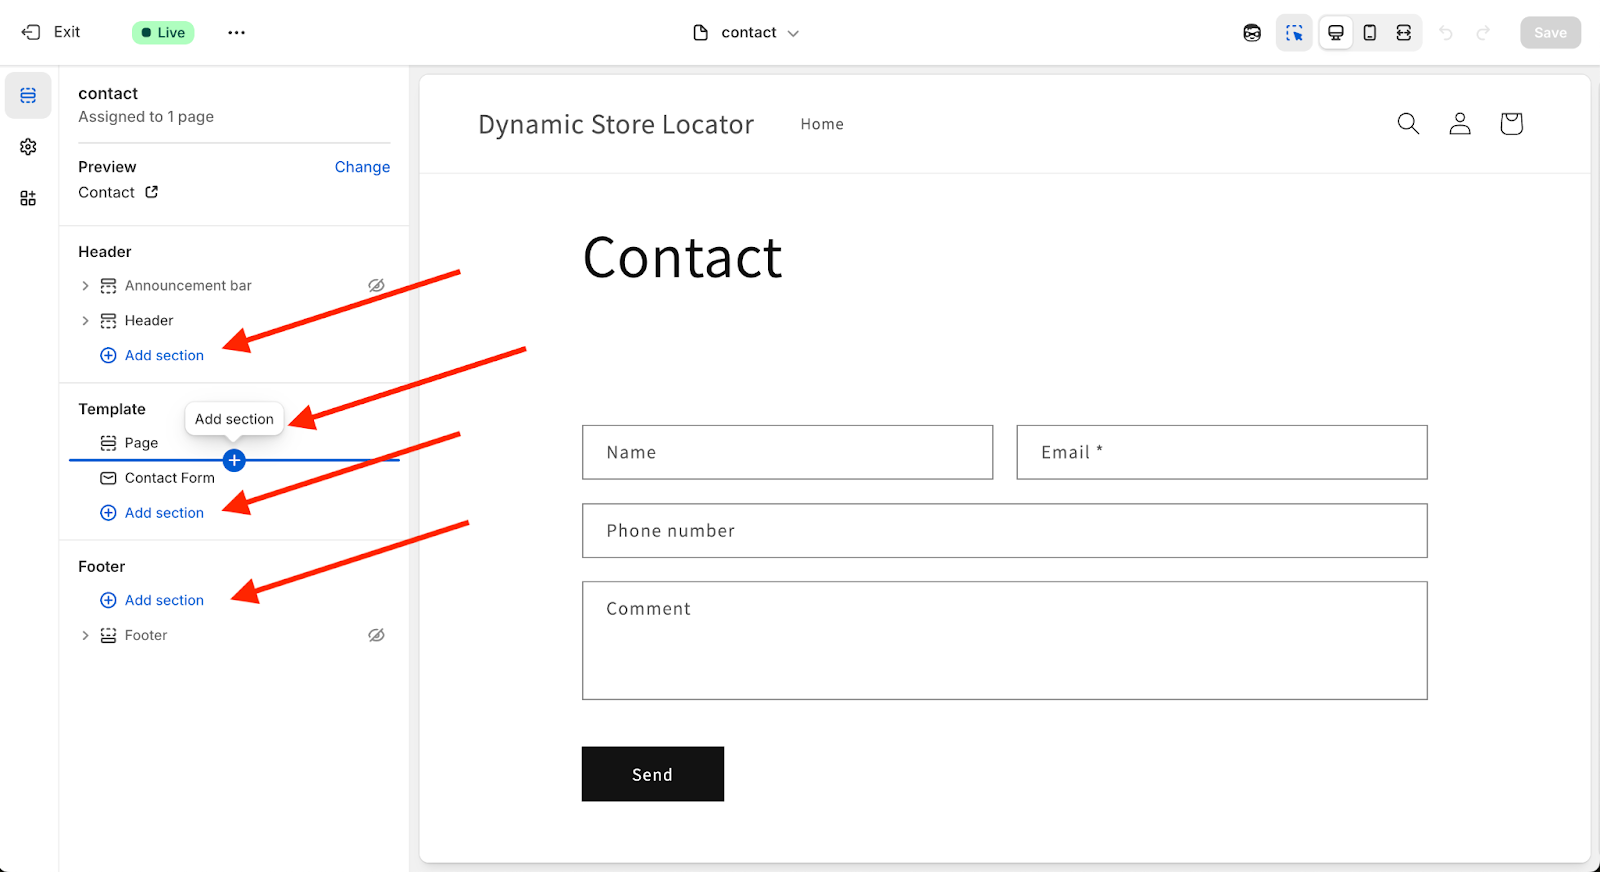
Step 3: Add a New Section
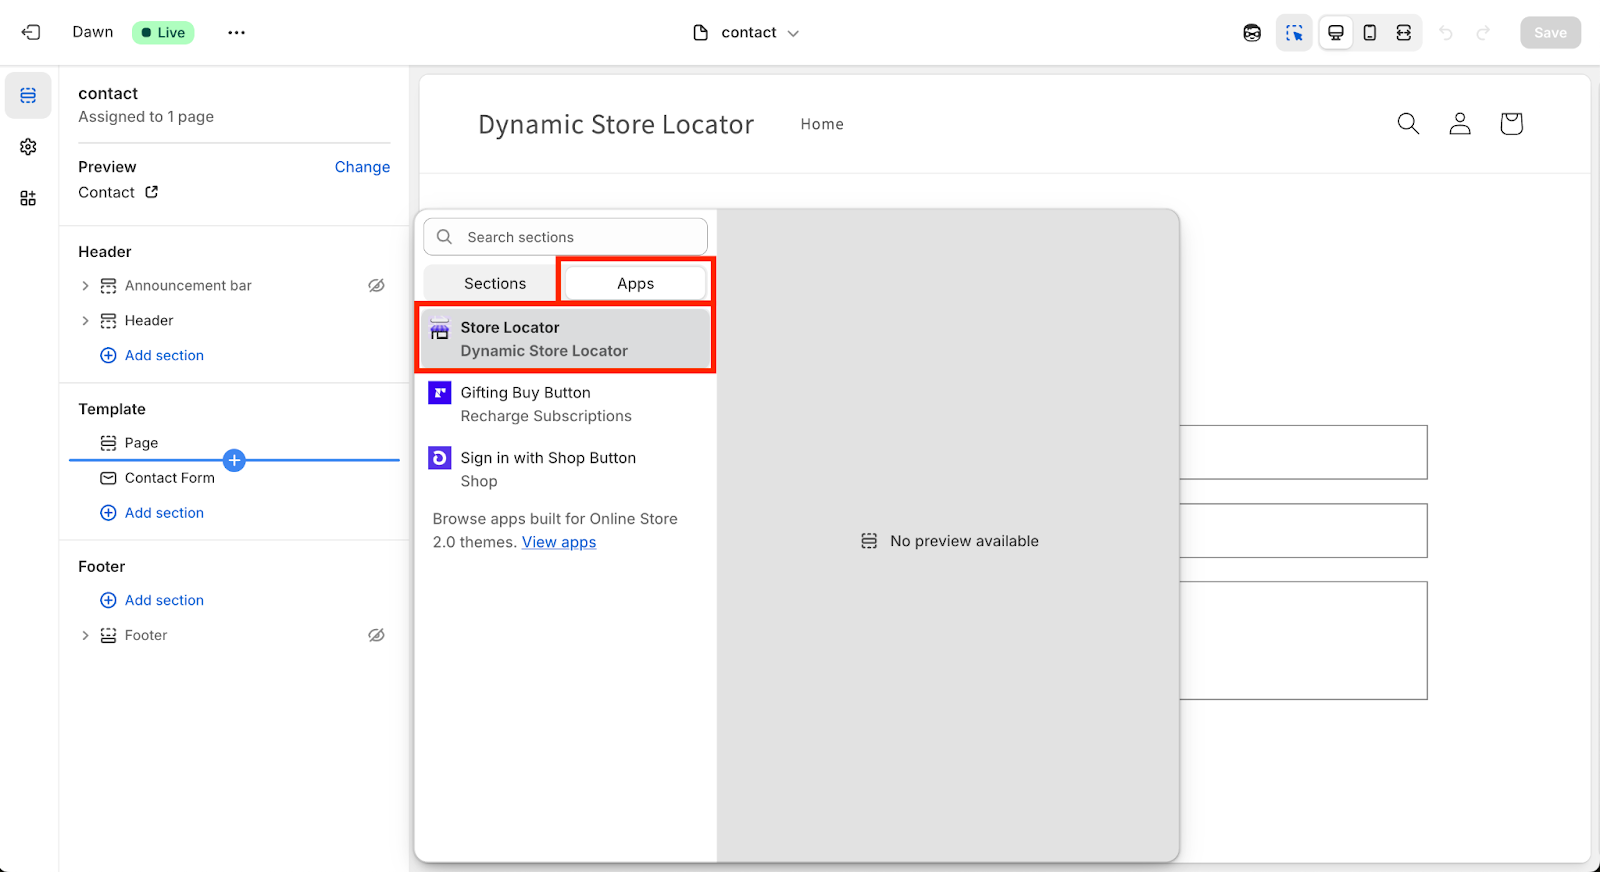
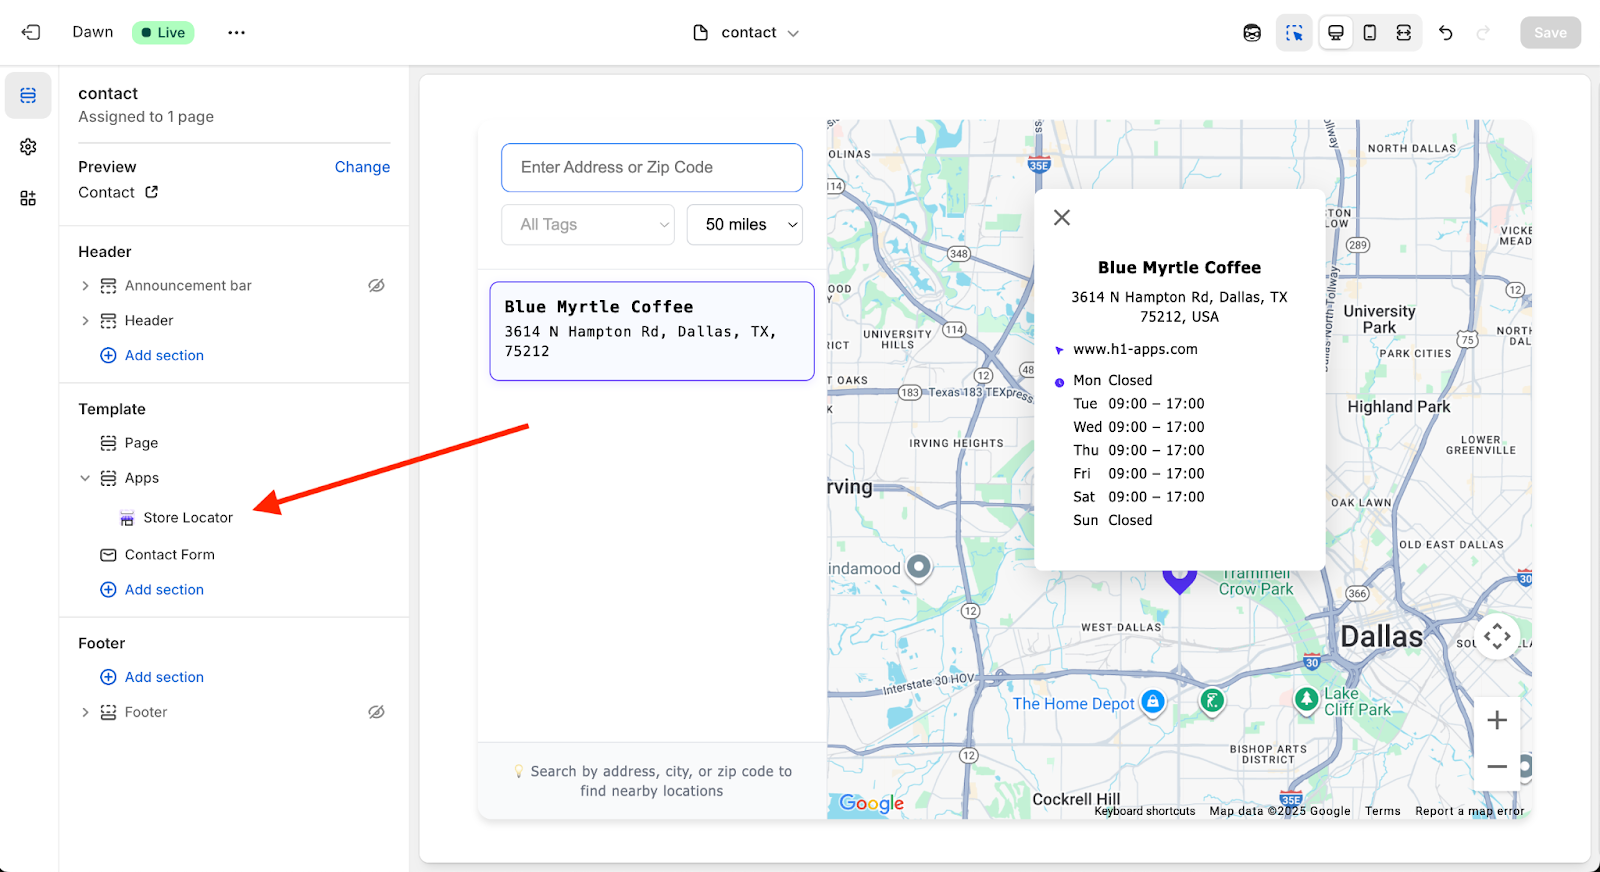
Wherever you want to add the map, click “Add Section” on the left side of the CMS tool bar and toggle to the “Apps”. Find the “Dynamic Store Locator” app and click it to add it to the page.
Please note: If you don’t see any “Add section” buttons, then you’re not using Shopify 2.0 and you’ll have to use OPTION 2 to add the map to your website.
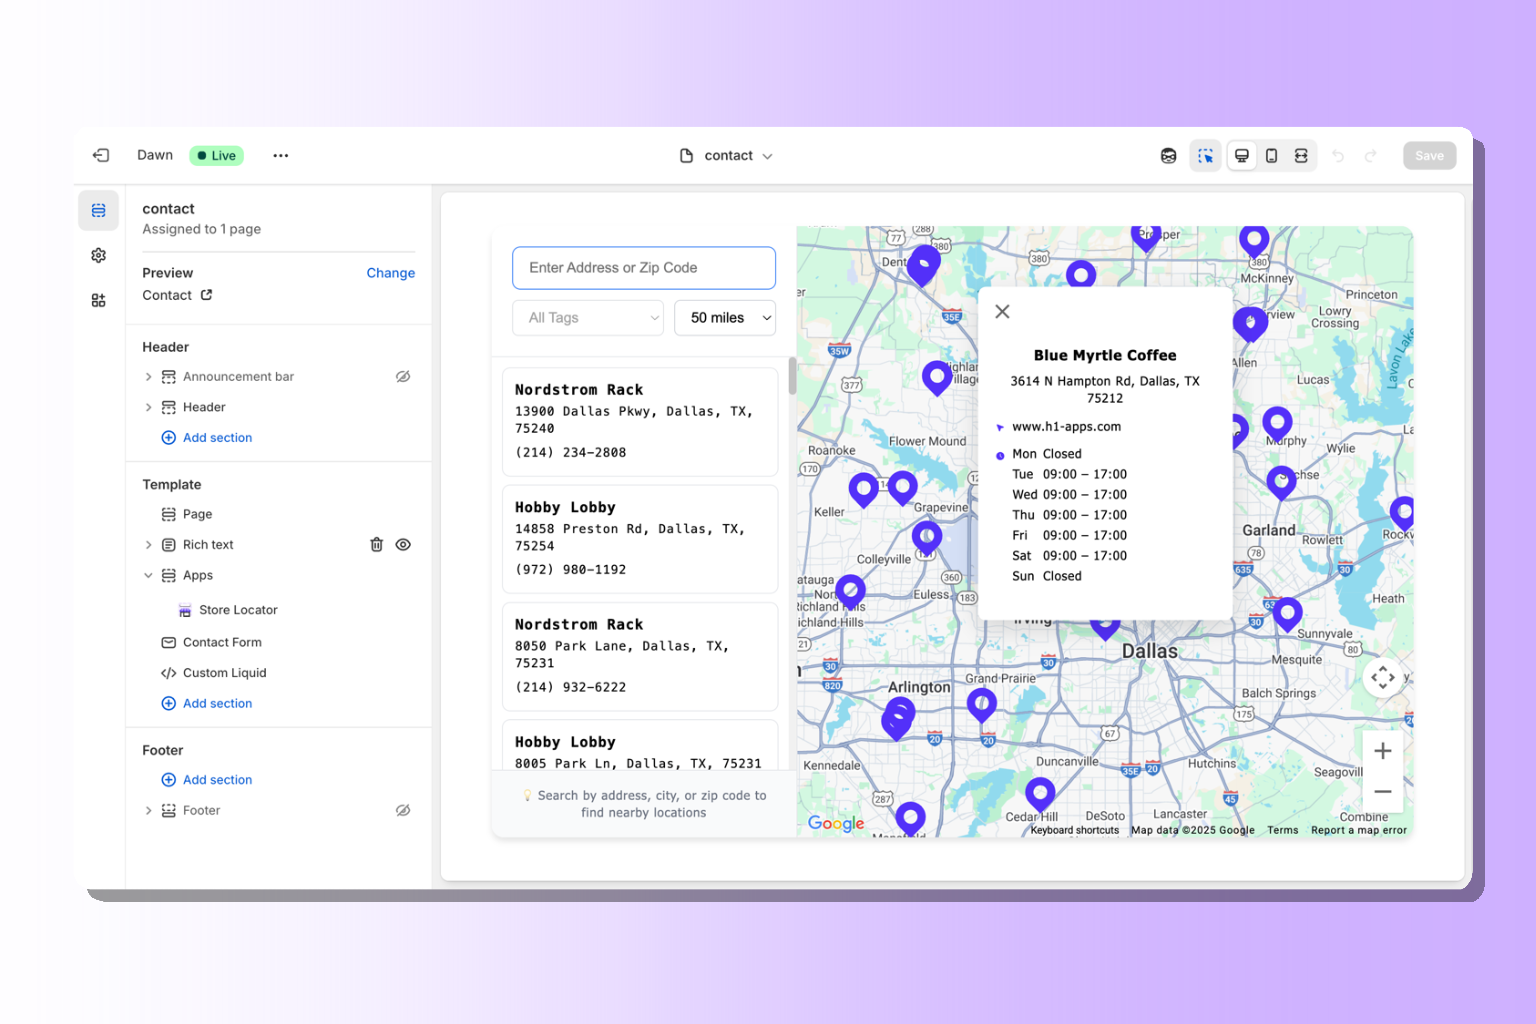
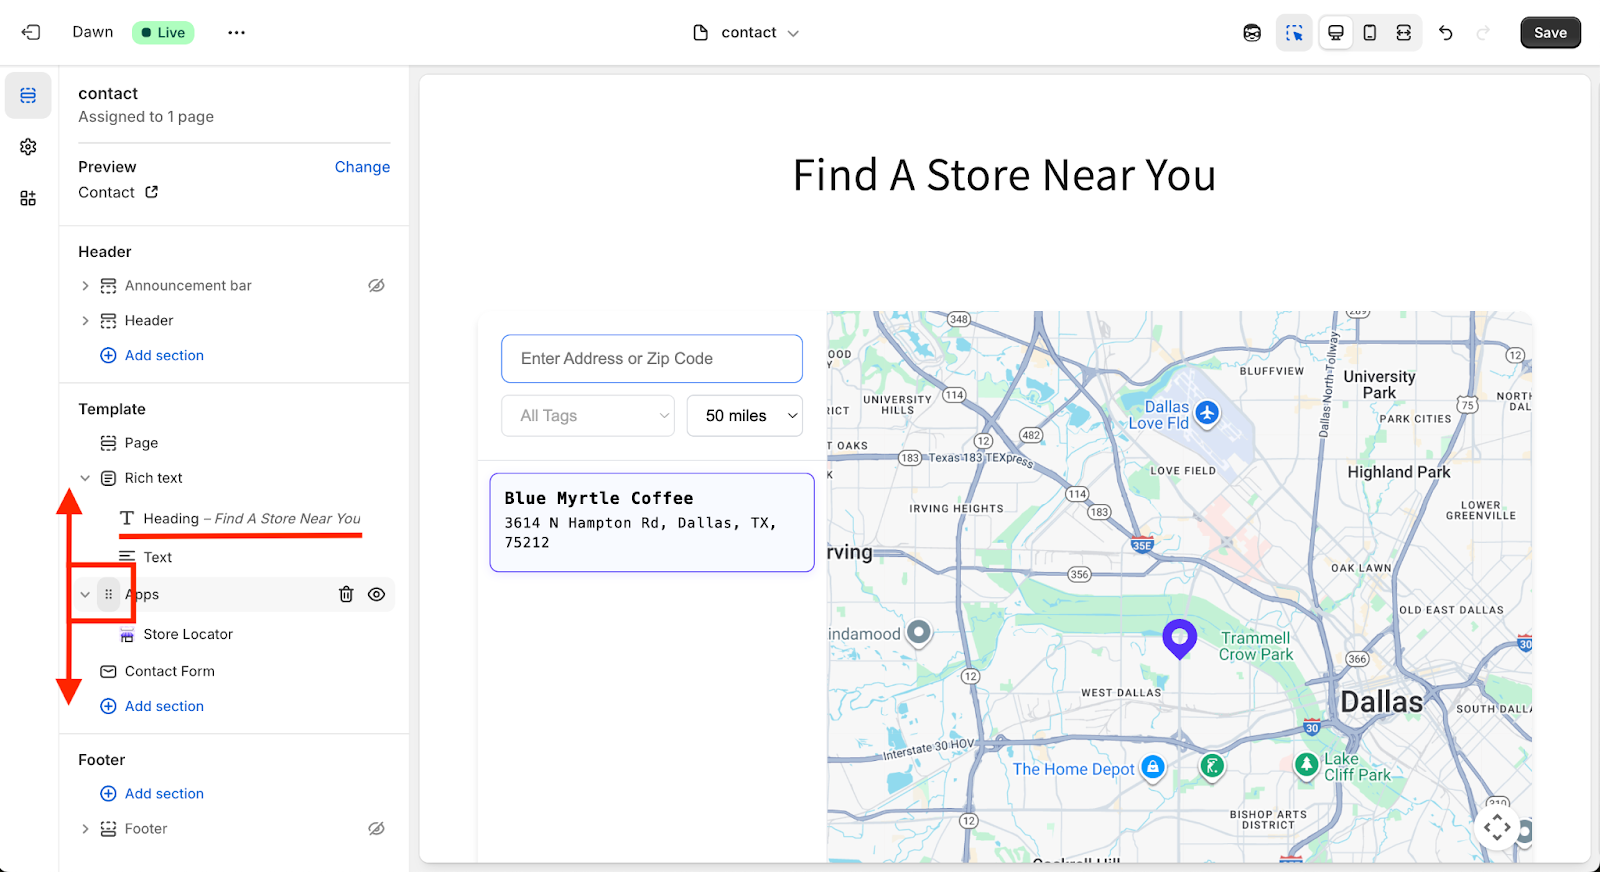
Step 4: Place Your Map
After that, you can drag and drop your map anywhere on the page, or add in headings and content above or below it. (In the example below, you’ll see that we added a Heading above the map by adding a new rich text section.)
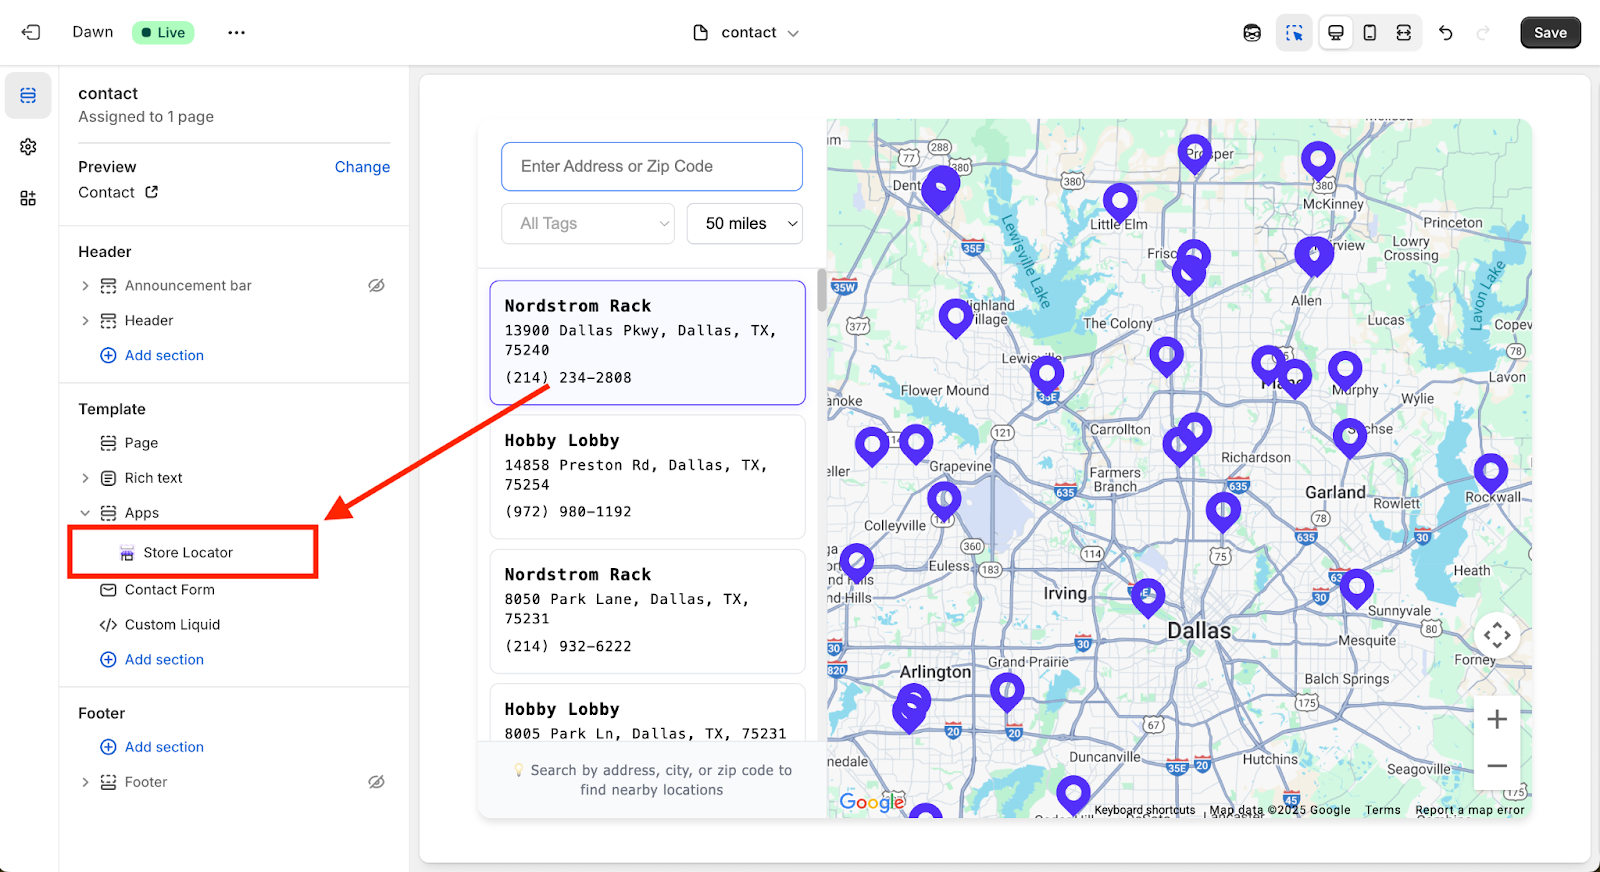
STEP 5: Adjust Map Settings
Once you’re satisfied with the placement of your map on the page, you can also access the map display settings directly from the theme editor. (This only applies to the Shopify 2.0 installation method. This is not available with the Option 2 embed code method.)
On the left side bar, click on the “Store Locator” app.
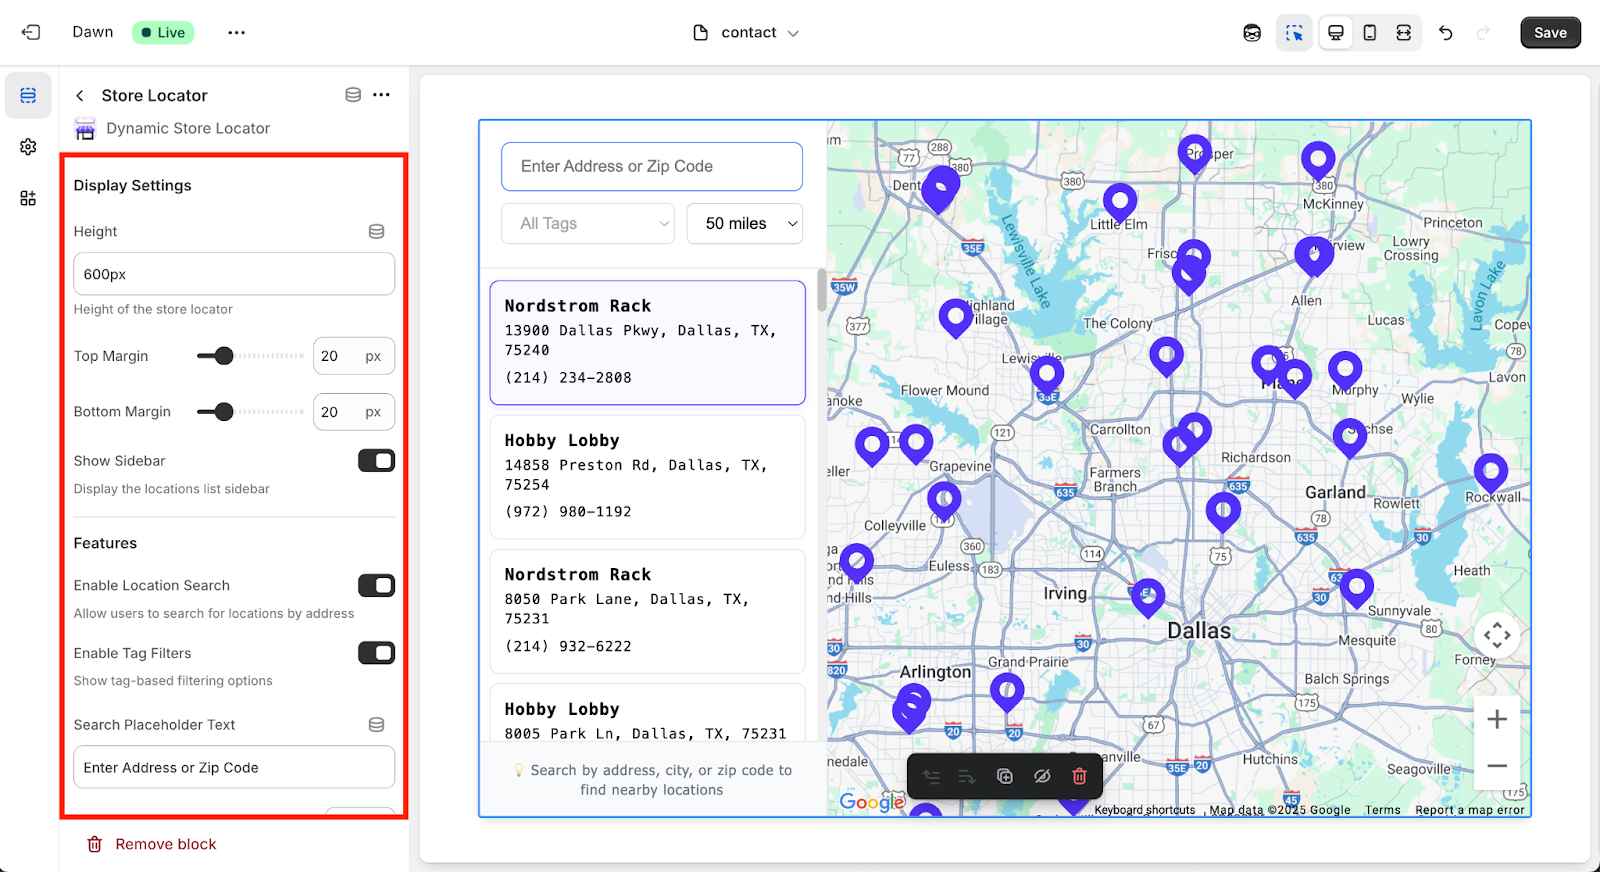
This will open all of the map display settings in the left side bar. You can control things like the map colors, map height, hide/display the search bar or filter tags, adding a shadow effect, and more.
OPTION 2: Embed with HTML Script
If you’re not on Shopify 2.0 (or you’d just prefer manually embedding the map to your codebase), then follow this installation method.
Step 1: Open the App Settings
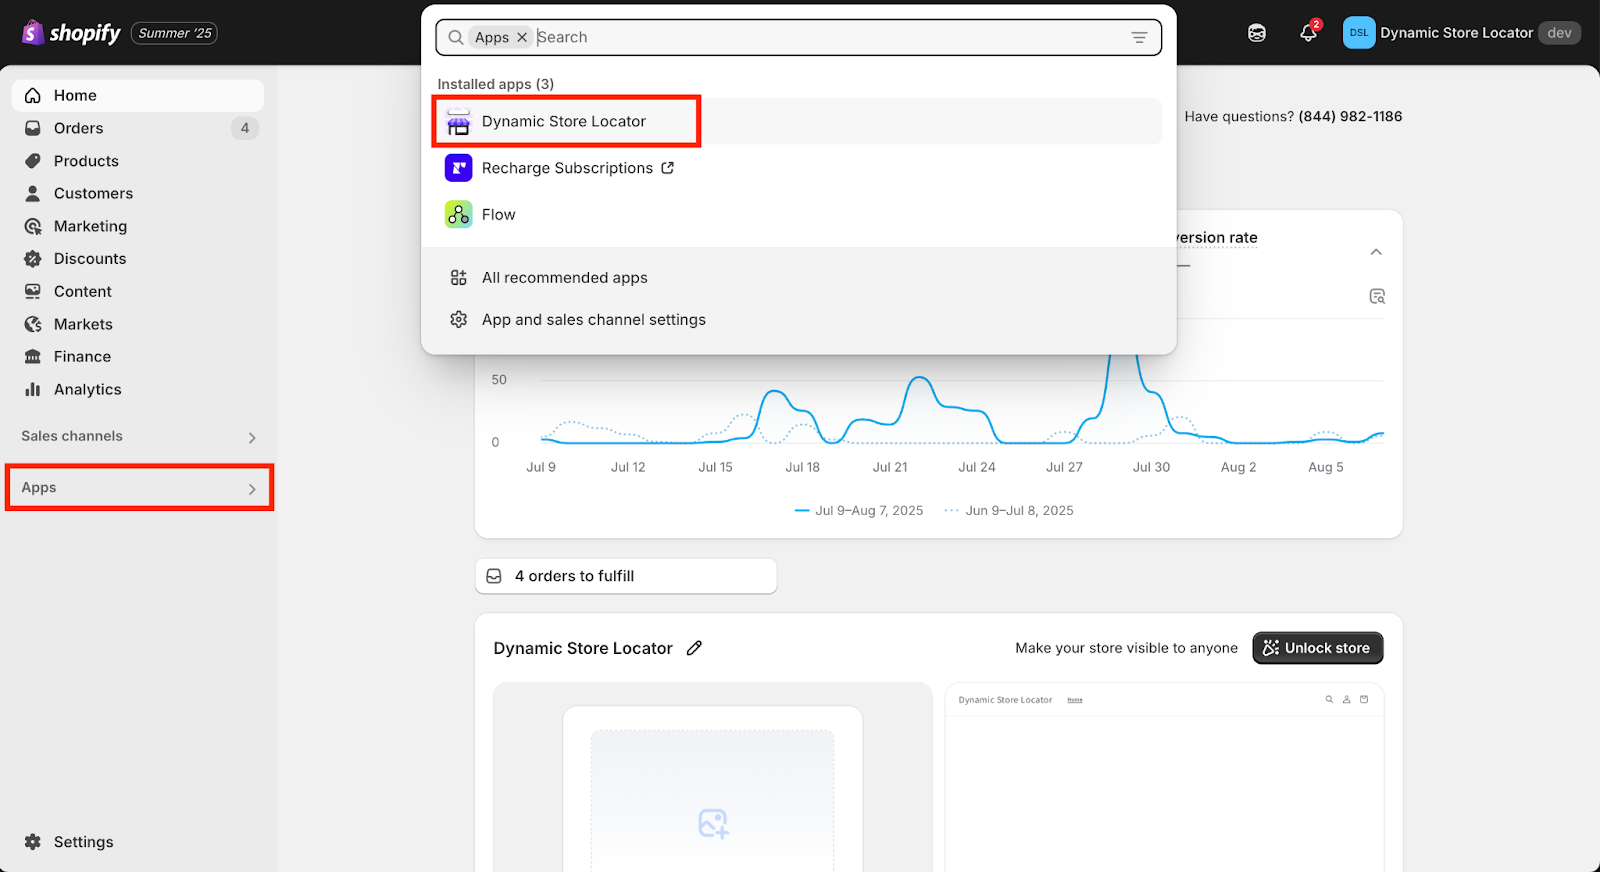
Open the Dynamic Store Locator app, by clicking “Apps” in your Shopify Admin and then selecting the “Dynamic Store Locator” app.
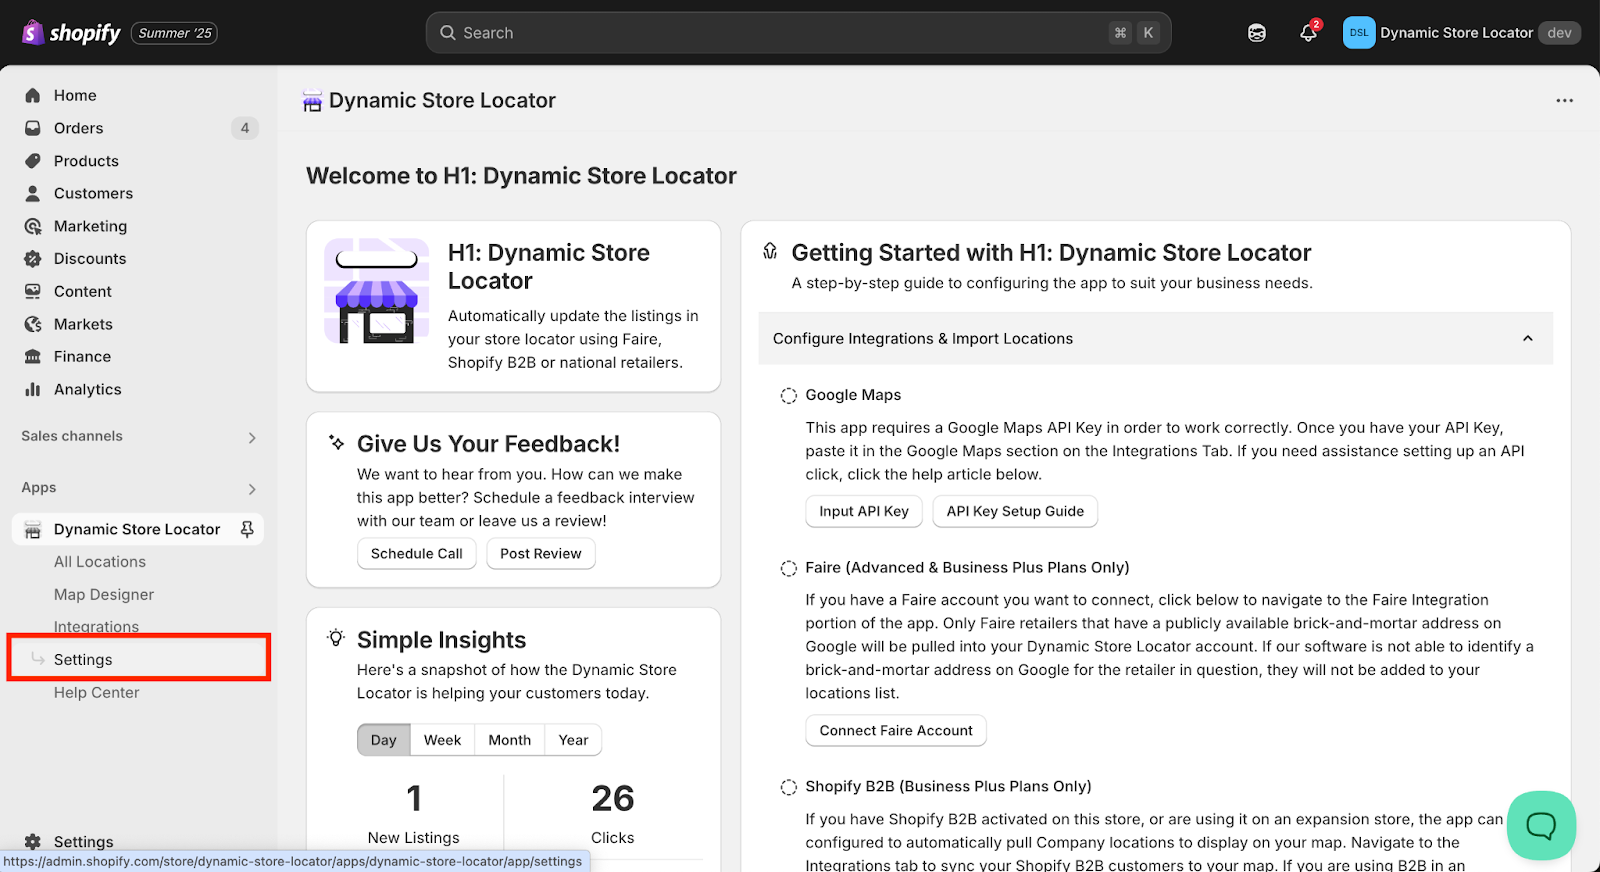
Navigate to the “Settings” in the app menu on the left.
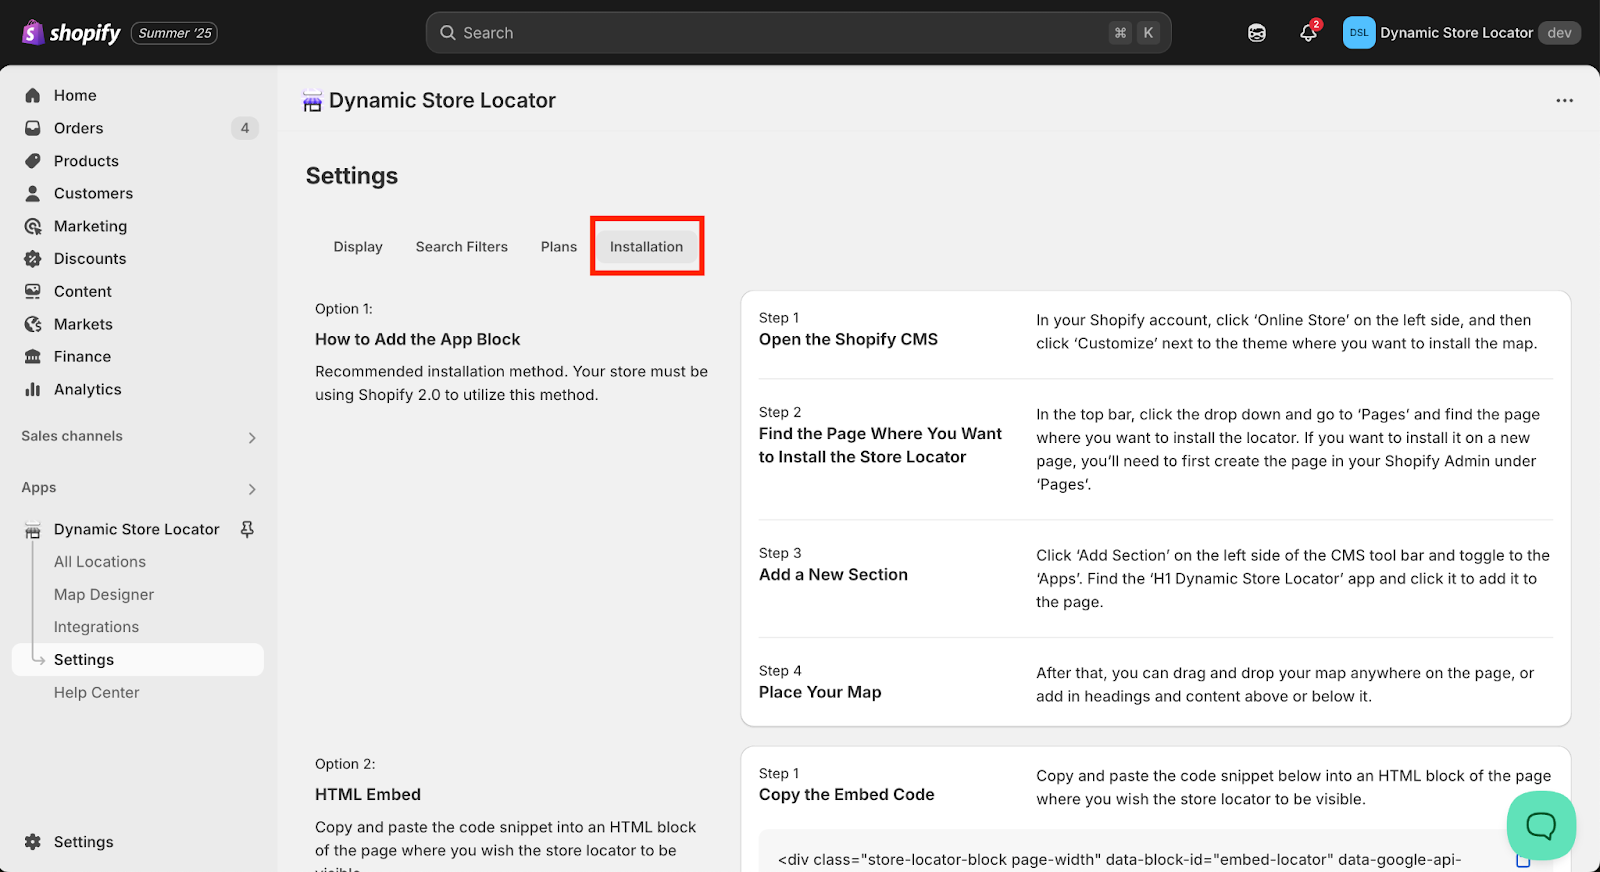
Click on “Installation” in the top menu bar.
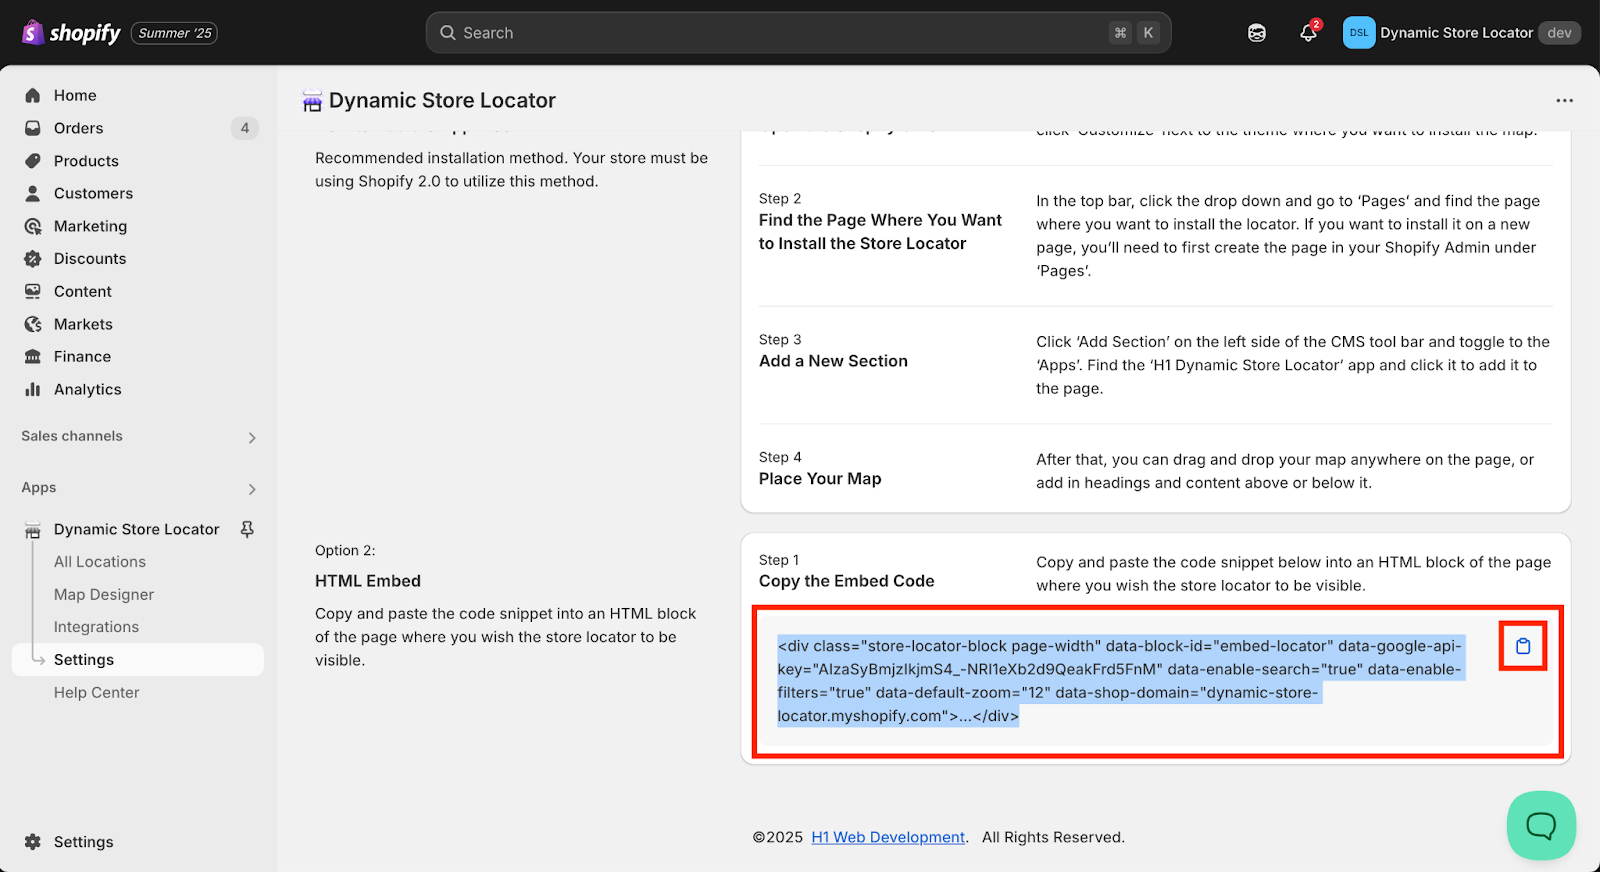
Step 2: Copy Your Embed Code
Scroll down on the Installation page to Option 2 and copy your unique HTML embed script.
Step 3: Open the Code Editor on the Theme where you want to install the App and paste the code snippet.
On the left menu, click “Sales Channels” then “Online Store”.
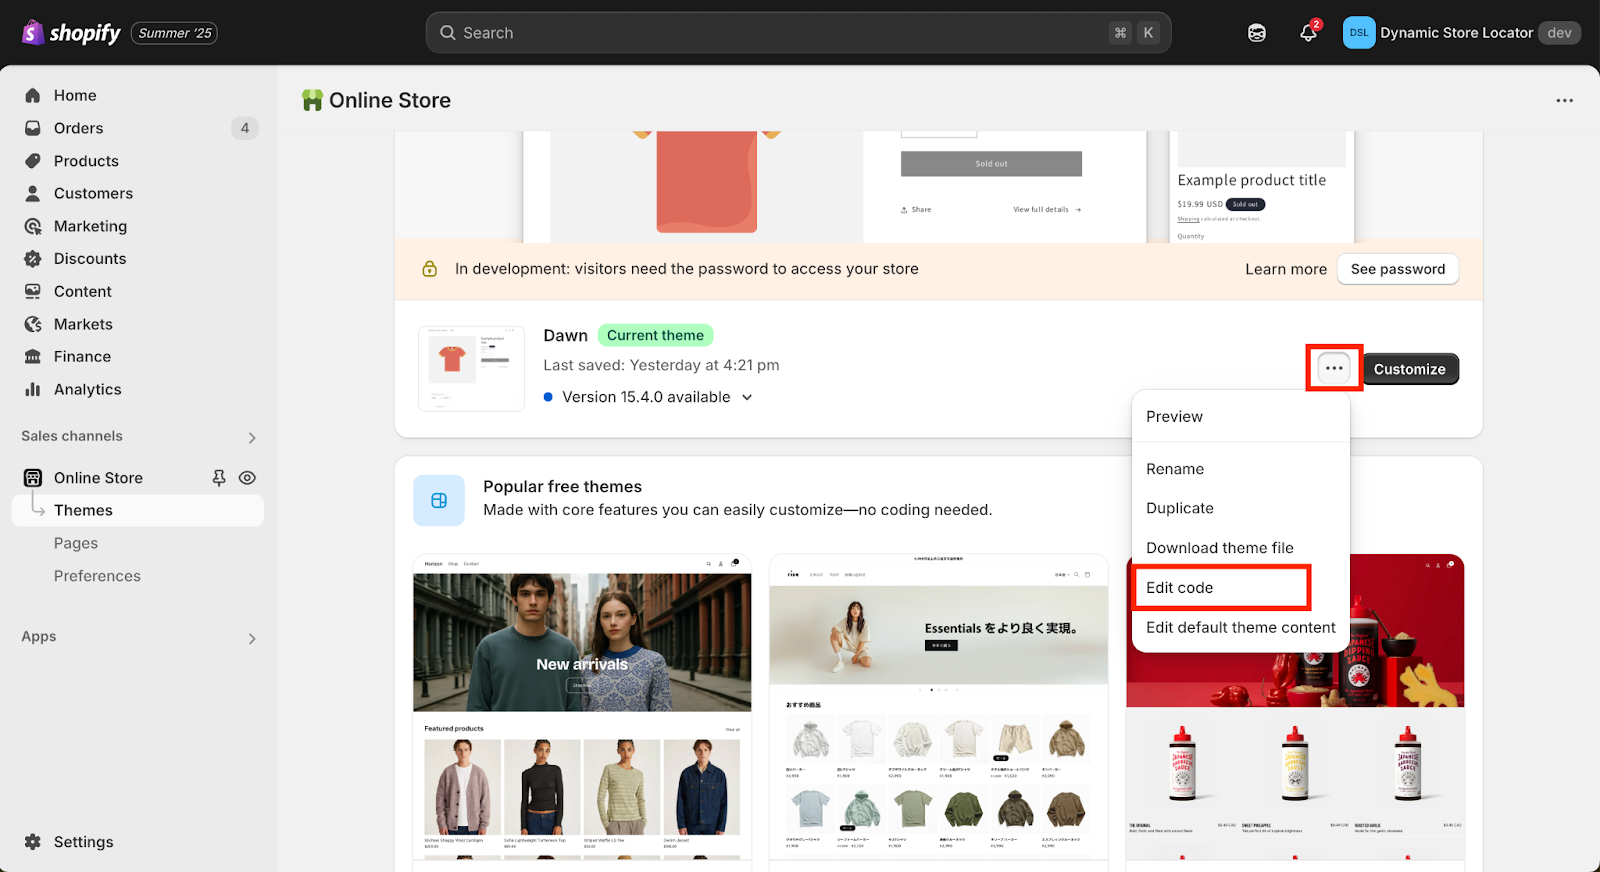
Find the theme where you want to install the map and click the menu icon (three dots) for that theme. Then click “Edit Code”.
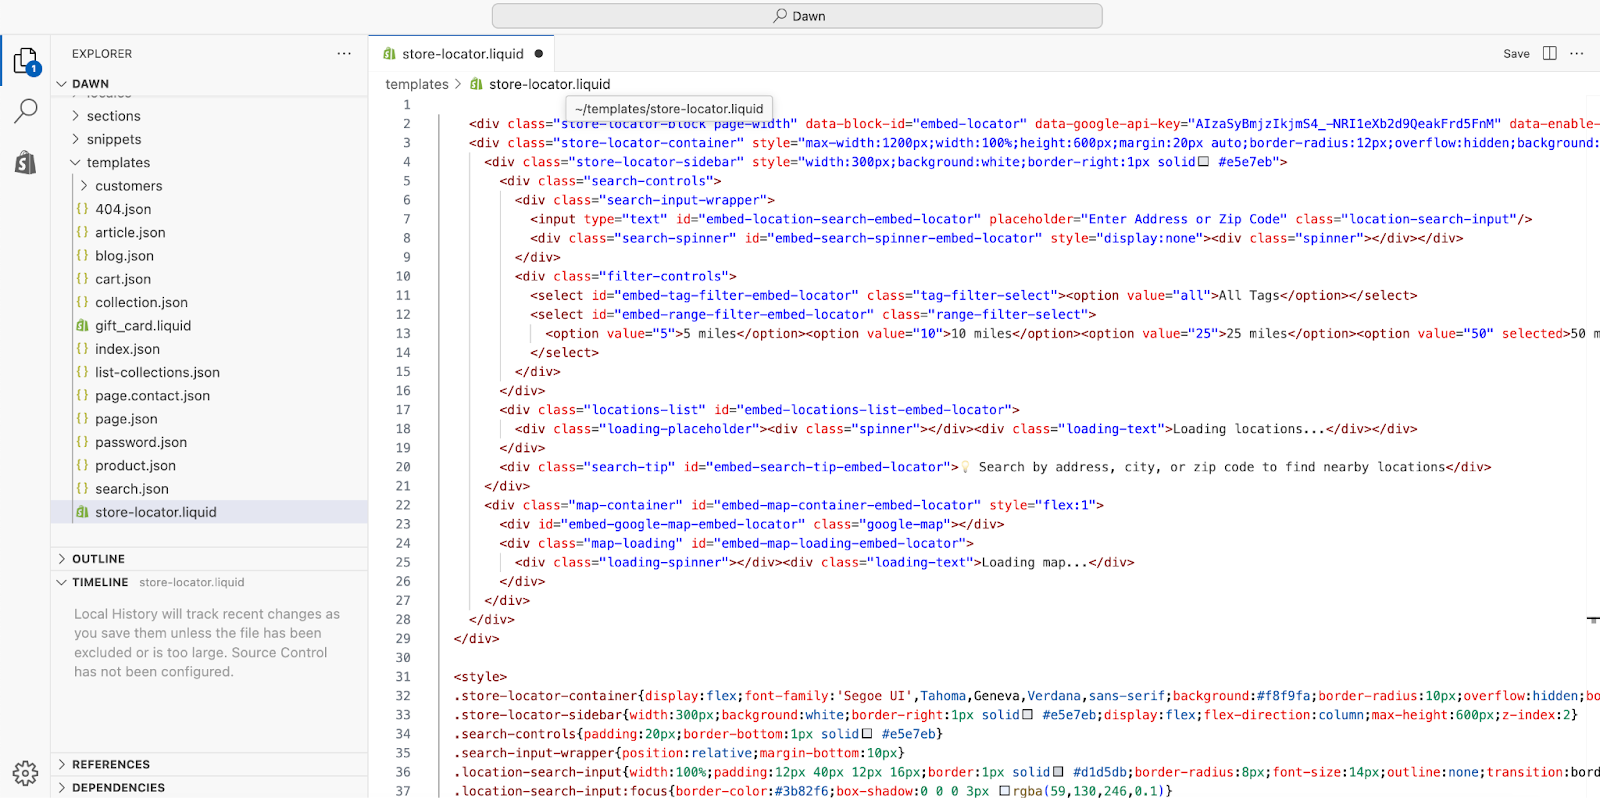
Find the page where you want to install the map and paste the HTML code into the section where you want the map to appear. Then save.
Recommended: Provide Your Developer the HTML Script
If you’re unfamiliar or uncomfortable editing your website’s code, send your developer or development team the snippet of HTML code and they’ll know how to embed the map where you’d like.
Troubleshooting
There’s an overlay on my map that says “For development use only”
After adding your map to your website and publishing the changes, there’s an overlay on the map that says “For development use only” and you can’t use the map. This is an issue with your Google Maps API Key.
First, please ensure that you’ve taken the necessary steps to Set Up A Google Maps API Key. If you’ve already set up your Maps API Key, then follow our guide on Troubleshooting Common Google Maps API Key Problems. And if you’re still encountering issues, you can reach out to our support team with one of the methods detailed below.
We are happy to help!
We offer FREE white glove installation assistance to all customers. Schedule an installation meeting here.